Elevate Your Move-Out Cleaning: Stay Organized and Efficient
Posted on 03/06/2025
Elevate Your Move-Out Cleaning: Stay Organized and Efficient
Moving out of a residence can be both exciting and daunting. Amidst the packing, planning, and logistics surrounding a move, one crucial task often gets pushed to the background: thorough move-out cleaning. A meticulously cleaned space not only helps secure your security deposit but also leaves a lasting impression on landlords or new homeowners. If you want to elevate your move-out cleaning and ensure your process is organized and efficient, our comprehensive guide will walk you through every essential step. Make your move seamless and stress-free by mastering another key element of this major life transition.
What is Move-Out Cleaning?
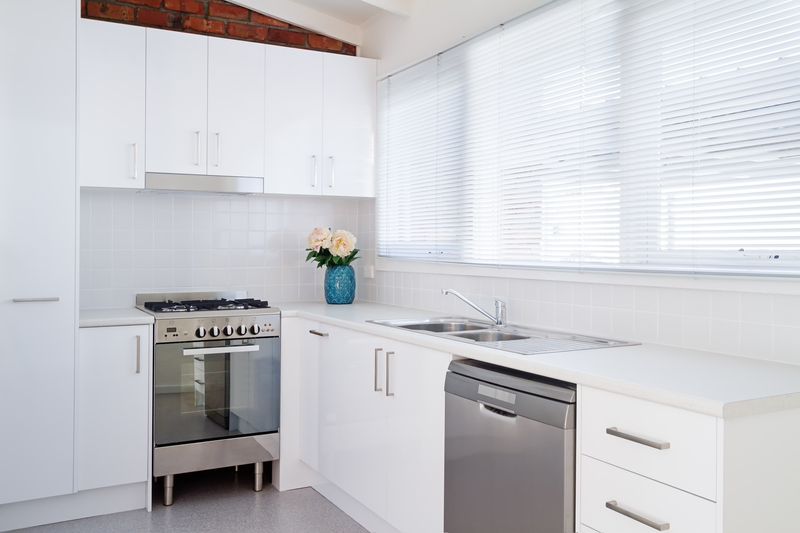
Before diving into the advanced strategies to elevate your move-out cleaning, it's important to fully understand what move-out cleaning entails. This deep-cleaning process goes far beyond everyday tidying up and covers every inch of the property you're leaving. The goal is to restore the living space to its original or best-possible condition.
- Kitchen: Scrub appliances, cabinets, countertops, sinks, and floors.
- Bathrooms: Disinfect toilets, showers, bathtubs, sinks, and mirrors.
- Living areas: Dust surfaces, baseboards, and light fixtures. Clean windows and floors.
- Bedrooms: Clean walls, windows, closets, and carpets or floors.
- General: Remove trash, vacuum, and spot-clean any marks or stains on walls.
Pro Tip: Some landlords or property managers provide a checklist for move-out cleaning. Be sure to request and follow it if available to maximize your deposit return!
Why Elevate Your Move-Out Cleaning?
Why should you go the extra mile to enhance your move-out cleaning process? Here's why elevating this step is so important:
- Secure your full security deposit: Incomplete cleaning is one of the most common reasons for deposit deductions.
- Fulfill your lease obligations: Many leases require tenants to return the property in "broom clean" or pristine condition.
- Leave a positive impression: A spotless unit can earn you strong references from property managers or landlords.
- Reduce stress: An organized and efficient cleaning plan helps minimize last-minute surprises and eliminates overlooked tasks.
- Smooth transitions: Make moving easier for the next occupants and help keep relationships amicable.
With motivation established, let's dive into how to elevate your move-out cleaning and keep your process streamlined and effective.
Step-by-Step Move-Out Cleaning Checklist
1. Start With a Plan
Begin by mapping out a move-out cleaning strategy. This will help you break the workload into bite-sized tasks and maintain focus.
- List all rooms and common areas that need attention.
- Gather cleaning materials ahead of time.
- Set a realistic cleaning schedule, ideally allowing 1-2 days prior to move-out.
- Assign tasks if you have roommates or family helping.
2. Pack and Declutter First
Don't try to clean around your belongings. Instead, pack up as much as possible before you tackle deep cleaning. This elevates your cleaning by making every surface accessible and reducing dust or clutter. As you go:
- Sort items into keep, donate, sell, or discard piles.
- Box up non-essentials first, leaving only immediate necessities for the final days.
- Dispose of trash and unwanted items immediately.
3. Gather Essential Cleaning Supplies
To make move-out cleaning efficient, assemble all your supplies at the start:
- All-purpose and disinfectant cleaners
- Glass and window cleaners
- Sponges, scrubbers, and microfiber cloths
- Vacuum, mop, and broom
- Bucket and gloves
- Garbage bags and magic erasers (for tough wall marks)
4. Focus on High-Impact Areas
To elevate your move-out cleaning game, focus on details often scrutinized by landlords:
- Kitchen appliances--Deep clean the inside and outside of the oven, refrigerator, microwave, and dishwasher. Don't forget to pull out appliances and clean behind them.
- Bathroom grout and fixtures--Scrub tile grout and polish faucets for a like-new shine.
- Baseboards, vents, and light fixtures--Dust and wash for an overall refreshed space.
Tip: Take before-and-after photos of your work! These can document your efforts in case of disputes over the property's condition.
5. Clean Top to Bottom
This classic cleaning principle ensures dirt and dust always fall onto surfaces you haven't cleaned yet. Start with ceiling fans, light fixtures, and tops of cabinets and work your way down to walls, windowsills, furniture, and floors last. This method is efficient and prevents duplicate work.
6. Deep Clean Floors
Floors show wear quickly, so elevate your cleaning here:
- Carpets: Vacuum thoroughly, spot-treat stains, and consider steam cleaning if needed.
- Hard floors: Sweep and mop, paying special attention to corners and under appliances.
If carpets are professionally cleaned, keep receipts in case the landlord requests proof.
7. Final Walkthrough and Repairs
After cleaning, perform a walkthrough (preferably with your landlord or their agent present):
- Check for any missed spots or overlooked repairs (such as wall holes from nails or screws).
- Patch holes and touch up paint if necessary.
- Address any last-minute issues for a truly elevated finish.
Tips to Stay Organized and Efficient During Move-Out Cleaning
Leverage a Printable Cleaning Checklist
An organized move-out cleaning checklist can be a game-changer. Create or download a printable version and check off items as you go. This ensures nothing is forgotten and keeps you on track.
Divide and Conquer
If you're moving with roommates or family, split tasks by room or area. This not only cuts down cleaning time but also enhances efficiency and ensures accountability.
Time Block Each Task
Assign specific time windows to each cleaning chore. For example:
- Kitchen: 2 hours
- Bathroom: 1 hour
- Living Room: 1 hour
This approach keeps you focused and prevents burnout.
Maintain a Designated Cleaning Kit
Store all cleaning supplies in a portable bin or caddy. This keeps everything together and eliminates time lost searching for products or tools, boosting both organization and efficiency.
Enlist Professional Help When Needed
If your lease or schedule demands a superior standard of cleanliness, consider hiring a professional move-out cleaning service. They can tackle stubborn stains, appliances, and specialized surfaces you might not be equipped to handle.
Common Mistakes to Avoid in Move-Out Cleaning
As you aim to elevate your move-out cleaning, beware of these frequent errors:
- Cleaning too early: If you clean before all items are packed or removed, you'll likely create new messes that require repeat cleaning.
- Ignoring small repairs: Landlords often charge for small dents, nail holes, or broken blinds left unaddressed.
- Neglecting hidden areas: Spaces beneath appliances, inside vents, behind toilets, and closet shelves are often missed.
- Leaving residue or strong odors: Use neutral or unscented cleaners to avoid overwhelming fragrances.
Frequently Asked Questions About Move-Out Cleaning
How long does move-out cleaning take?
The time required varies based on property size and condition, but a thorough job often takes 4-8 hours for a small apartment, and up to a full day or more for larger homes.
Is move-out cleaning always required?
Most leases legally require move-out cleaning. If not, it's still highly recommended to avoid fees or disputes.
Can I do it myself or should I hire professionals?
DIY is possible for many renters, however, if the property is very dirty or your time is limited, investing in a pro cleaning service can ensure you meet the highest standards and avoid penalties.
What if I don't have time to deep clean?
Pace your cleaning over several days leading up to move-out, or recruit help from friends, family, or a cleaning service to divide the task load.
Conclusion: Achieve Stress-Free, Elevated Move-Out Cleaning
Elevating your move-out cleaning is more than just a courtesy--it's a smart strategy for securing your deposit, maintaining strong rental references, and leaving your old home with dignity. By staying organized, following a detailed checklist, and focusing on efficiency, you'll ensure every corner meets expectations. Don't forget to photograph your sparkling results, address repairs, and communicate openly with your landlord throughout the process.
Ready to make your next move your easiest yet? With these tips and tools at your disposal, move-out cleaning no longer has to be a headache--transform it into an efficient, organized, and rewarding final step in your moving journey!
Bookmark This Guide for Your Next Move
Whether you're a frequent renter or a homeowner preparing for your next chapter, remember these practical steps to consistently deliver top-tier move-out cleaning results--saving you time, money, and stress with every transition.
- Use this guide as a repeat resource.
- Share with friends and family planning a move.
- Impress your landlord and future self with your thorough approach!
Elevate your move-out cleaning, stay organized and efficient, and face your next move with confidence!
Latest Posts
A Step-by-Step Guide to Moving House Without Stress
Successfully Declutter for a Better Moving Experience
Uncover Expert Tips for Effective Sofa Preservation and Storage
Proven Tactics for Relocating Your Bed and Mattress
Elevate Your Move-Out Cleaning: Stay Organized and Efficient


